


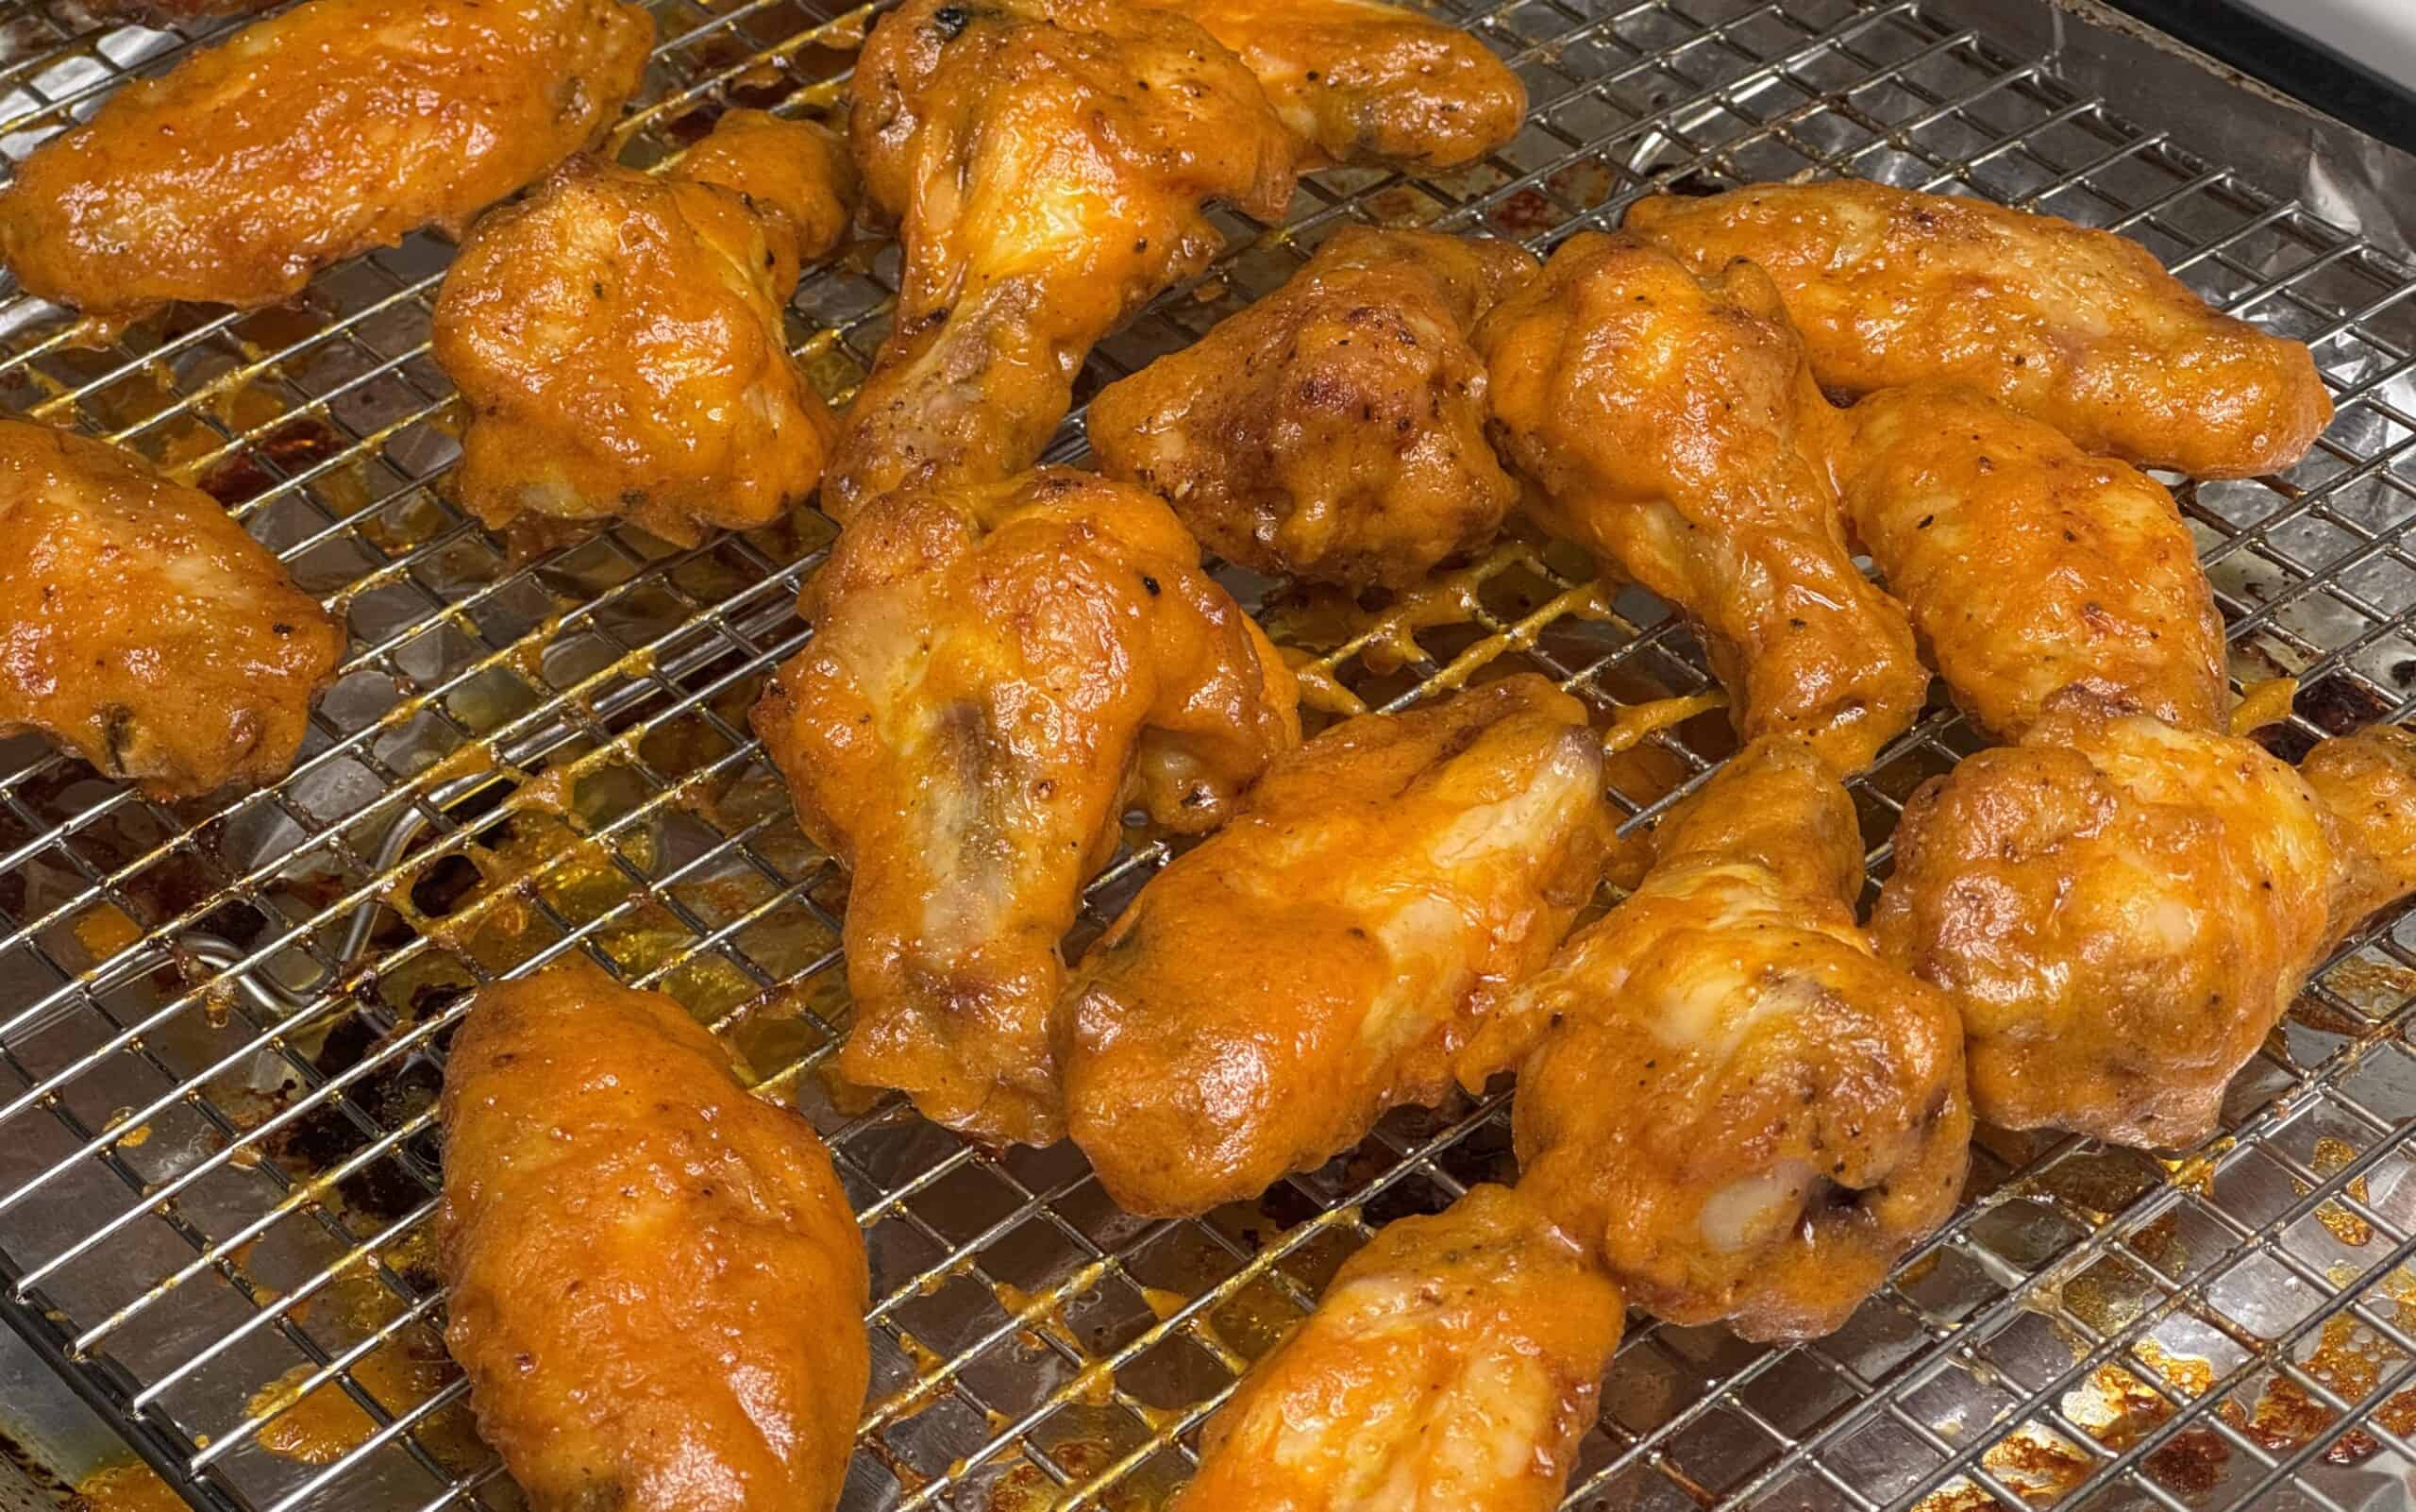
The 0-400 method sounds like it shouldn’t work. You put raw chicken on a cold pellet grill like a recteq or Traeger, set it to 400°F, close the lid, and walk away. No preheating. No babysitting. No multi-stage cooking other than a flip. An hour later, you pull off chicken wings and thighs with crispy skin and smoke-infused meat that rivals anything you’ve spent two hours managing.
Here’s why it works, and two recipes to prove it.
Table of Contents
What Is the 0-400 Method?

The technique originated in recteq pellet grill owner forums and Reddit threads around 2022–2023, where backyard cooks started documenting an unconventional approach: load the chicken onto a cold grill, dial in 400°F, and let the grill climb to temp with the bird already on the grates.
The physics behind it is straightforward. During the 10–15 minutes it takes a pellet grill to reach 400°F, it produces its dirtiest, heaviest smoke output: the startup phase. That smoke runs directly over cold chicken skin, which efficiently grabs it while the surface is still cold and moist, which is when smoke sticks best. Once the grill settles at temperature, the heat converts to a dry, convective blast that drives moisture out of the skin and crisps it without a rubbery texture.
The result of the 0-400 method: smoke absorption during the cold phase and high-heat skin crisping during the hot phase, two stages in one unattended cook.
What makes it different from a traditional smoke-then-sear: A conventional two-stage approach (smoke at 225°F, then blast to 400°F) requires you to physically intervene, manage two timers, and often results in a steam phase when the grill transitions temps. The 0-400 eliminates the transition window entirely.
Best pellet wood for chicken: Apple, cherry, or pecan. All three produce mild, sweet smoke that complements poultry without overwhelming it. Hickory and mesquite are stronger, so save them for when you want more smoke punch.
Does it work on gas or charcoal? No. The method depends on the startup smoke burst specific to pellet combustion. Gas produces no smoke. Charcoal produces uncontrolled dirty smoke throughout, not the brief burst you want here.
Two Rules Before You Cook Either Recipe
1. Pat the chicken completely dry. Moisture is the enemy of crispy skin. Use paper towels and press firmly on every surface, including underneath the skin where possible. If you plan ahead, dry-brine overnight: season with kosher salt and leave uncovered on a rack in the refrigerator for 8–12 hours. The salt draws out surface moisture, and the skin reabsorbs the brine, tightening. This alone is the single biggest crispiness upgrade you can make. Just be careful not to use too much salt in the rub, or it will be overly salty.
2. Skip sugar in your rub. The chicken sits at 400°F for a full hour. Sugar starts to burn well below 400°F. A rub with brown sugar or turbinado will leave you with blackened skin, not caramelized bark. Use salt, pepper, garlic powder, paprika, onion powder, and chili powder. Save the sweetness for a sauce or glaze applied in the final 10 minutes. Also use aluminum-free baking powder for that crispy skin.
Recipe 1: 0-400 Traeger Smoked Chicken Wings with Crispy Skin

Yield: 3–4 servings
Prep time: 10 minutes (plus optional overnight dry brine)
Cook time: ~60 minutes
Grill temp: 400°F
Target internal temp: 175°F to 200°F
Recommended pellets: Apple or cherry are tasty, but if you like more smoke punch, go for hickory or oak. Mesquite is pretty strong for chicken.
The Dialed In Dry Rub
| Ingredient | Amount |
|---|---|
| Kosher salt | 1 tsp |
| Black pepper | 1 tsp |
| Garlic powder | 1 tsp |
| Smoked paprika | 1 tsp |
| Onion powder | ½ tsp |
| Cayenne pepper | ¼ tsp |
| Cornstarch or Aluminum-Free Baking Powder | 3 tbsp |
Wings
| Ingredient | Amount |
|---|---|
| Whole party wings (flats + drumettes) | 3 lbs |
Optional Buffalo Glaze (applied last 10 minutes)
| Ingredient | Amount |
|---|---|
| Frank’s RedHot Original | ½ cup |
| Unsalted butter, melted | 3 tbsp |
| Garlic powder | ¼ tsp |
These taste great right out of the smoker. Sauces and glazes are a great option, but not mandatory. I love blue cheese dressing as much as a saucy glaze. You can go too far with flavors. Keep it simple and dial it in the way you like.
More Sauce Options: Garlic Parmesan and Lemon Pepper
Buffalo is the classic, but garlic Parmesan and lemon pepper consistently rank among the most popular wing flavors in the country. Neither one is spicy, and neither contains sugar, so both work perfectly with the 0-400 method. Toss the chicken wings in either sauce right after you pull them at 175°F. Nothing goes on the grill, so the skin stays crisp.
Garlic Parmesan
| Ingredient | Amount |
|---|---|
| Unsalted butter | 4 tbsp |
| Garlic, minced | 3 cloves |
| Parmesan, finely grated | ⅓ cup |
| Dried parsley | 1 tsp |
| Black pepper | ½ tsp |
Melt the butter over low heat and cook the garlic for 1 to 2 minutes, until fragrant but not browned. Toss the hot wings in the garlic butter, then add the Parmesan and parsley and toss again so the cheese sticks.
Lemon Pepper Wet
| Ingredient | Amount |
|---|---|
| Unsalted butter | 4 tbsp |
| Lemon pepper seasoning | 1 tbsp |
| Fresh lemon zest | 1 lemon |
| Fresh lemon juice | 1 tsp |
Melt the butter and stir in the lemon pepper, zest, and juice. Toss the wings right off the grill. For dry lemon pepper, skip the butter and dust the hot wings with seasoning instead.
Instructions
Step 1: Dry the wings. Remove the chicken wings from the packaging and pat them thoroughly dry with paper towels. Work over every surface. The drier they start, the crispier they finish.
Step 2: Season. Combine all dry rub ingredients, including the cornstarch, in a bowl and mix well. The cornstarch (or baking powder) is not optional; it acts as a moisture wick on the skin surface and is responsible for that restaurant-style crispiness. Toss wings in the seasoning mixture until every piece is evenly coated. You can also use aluminum-free baking powder for similar results.
Step 3: Load the cold grill. Do not preheat. A cold start is the core of the 0-400 method. Place the chicken wings directly on the cold Traeger grates with at least 1 inch of space between each piece. Crowding blocks airflow and creates steaming, exactly what you don’t want. Line your drip tray with foil or a Traeger drip tray liner before loading to save cleanup.
Step 4: Set and close. Set the Traeger to 400°F. Close the lid. Do not open it for the first 30 minutes.
Step 5: Flip and rotate at 30 minutes. Wings near the edges of a Traeger grill run hotter than the center. At the 30-minute mark, flip every wing and rotate edge pieces to the center. Close the lid and cook another 20 minutes.
Step 6 (optional): Apply Buffalo glaze. Whisk together Frank’s, melted butter, and garlic powder. At the 50-minute mark, brush glaze over the wings. Cook 5 minutes, flip, brush the other side, and cook a final 5 minutes.
Step 7: Pull and rest. Wings are done at 175°F internal (use an instant-read thermometer such as a Thermapen, or a leave-in probe like the MEATER Plus); however, taking them to 200°F is better, as the meat falls off the bone and they won’t be dry. Rest 5 minutes before serving. The juices redistribute and the skin firms up slightly as it cools.
What to Serve
Ranch or blue cheese, celery sticks, and pickled jalapeños. These wings hold up well as-is or sauced. If you skip the Buffalo glaze, dust with a little extra smoked paprika right off the grill.
Pro Notes
- Cornstarch, not regular baking powder. Baking powder can leave a slightly metallic taste when cooked at high heat. Cornstarch is neutral, as is aluminum-free baking powder.
- Wings at 165°F are technically safe per USDA guidelines, but 175°F to 200°F yields more tender connective tissue and a more satisfying texture.
- Traeger Pro 780 and Ironwood models tend to run hotter at the back left. Know your hot spots and rotate accordingly.

Recipe 2: 0-400 Traeger Chicken Thighs with Honey Garlic Glaze
Thighs are more forgiving than wings and more flavorful than breasts. The 0-400 method is particularly well-suited here because the gradual heat ramp slowly renders the subcutaneous fat, the layer between the skin and meat, which bastes the meat from the inside and produces the kind of juicy thigh you typically only get from a proper braise or a long, low-and-slow smoke.
Yield: 4 servings
Prep time: 10 minutes
Cook time: 60–75 minutes
Grill temp: 400°F
Target internal temp: 175°F to 200°F (200°F preferred)
Recommended pellets: Pecan, apple, or any wood flavor you enjoy. Stay away from stronger woods like mesquite.
The Dialed In Thigh Rub
| Ingredient | Amount |
|---|---|
| Kosher salt | 1½ tsp |
| Coarse black pepper | 1 tsp |
| Garlic powder | 1 tsp |
| Smoked paprika | 1½ tsp |
| Onion powder | ½ tsp |
| Chili powder | ½ tsp |
| Dried thyme | ¼ tsp |
Thighs
| Ingredient | Amount |
|---|---|
| Bone-in, skin-on chicken thighs | 2.5 lbs (about 5–6 thighs) |
Honey Garlic Glaze (applied last 10 minutes)
| Ingredient | Amount |
|---|---|
| Raw honey | 3 tbsp |
| Soy sauce | 1 tbsp |
| Fresh garlic, minced | 3 cloves |
| Apple cider vinegar | 1 tsp |
| Crushed red pepper flakes | ¼ tsp |
Instructions
Step 1: Prep the thighs. Pat each thigh dry on all sides, including under the skin, if you can loosen it without tearing. Season the dry rub mix directly on the skin side, the underside, and, if possible, under the skin, directly onto the meat. Press the seasoning in, don’t just dust it on.
Step 2: Load cold. Place the thighs, skin-side up, on a cold Traeger grate. Leave space between each one. Do not use a pan or rack insert; direct grate contact is essential for bottom-side rendering and even cooking.
Step 3: Set to 400°F and close the lid. No preheating. With the 0-400 method, the grill climbs to temp with the chicken on the grate. The initial smoke burst during startup is part of the flavor profile.
Step 4: Cook undisturbed for 50 minutes. Unlike wings, thighs are thick enough that they don’t need an early flip. At the 50-minute mark, check the internal temperature with a probe thermometer (a wireless probe like the ThermoWorks RFX MEAT Mini works well here) inserted into the thickest part of the meat, away from the bone. You’re looking for 165°F at this check, fully safe, but not at the target texture yet.
Step 5: Glaze. While the thighs cook, combine honey, soy sauce, minced garlic, apple cider vinegar, and red pepper flakes in a small bowl. At the 50-minute mark, brush glaze on the skin side. Close the lid, cook 5 more minutes, flip, glaze the underside, and cook another 5 minutes. Flip back skin-side up for the final 2–3 minutes so the top glaze caramelizes and sets.
Step 6: Pull at 175°F. At 175°F, the collagen in thigh meat has fully broken down, yielding a clean, pull-away texture without dryness. Bone-in thighs can safely reach 185°F if you prefer a more tender, fall-off-the-bone texture. Rest 5–10 minutes before serving. I’ve taken the thighs to 200°F and they still worked great. Very forgiving.
What to Serve
These thighs pair naturally with white rice and a simple cucumber salad dressed in rice vinegar, sesame oil, and salt. The honey garlic glaze also works well over roasted broccolini. If you skip the glaze entirely, the rub alone produces a clean, savory thigh that works in tacos or grain bowls.
Pro Notes
- Bone-in thighs take 60–75 minutes, depending on size. A 6-oz thigh runs 60 minutes; an 8-oz thigh may need 75. Thermometer over timer, always.
- Boneless skinless thighs can work with this method, but won’t develop crispy skin. Reduce cook time to 40–50 minutes and pull at 165°F.
- The honey in the glaze will char quickly at 400°F; don’t apply it more than 10 minutes before pulling. The window is tight, but the payoff is a lacquered, slightly sticky surface that’s worth the timing discipline.
- Traeger’s Ironwood and Timberline models with the downdraft exhaust system provide more even heat distribution, which means less rotation management than the Pro series.
Gear Used in This Article
- Traeger Pro 575: the pellet grill used to test both recipes
- MEATER Plus: wireless probe for tracking internal temp without opening the lid
- TempPro TP19H: budget instant-read thermometer for the final temp check
- Traeger drip tray liners: faster cleanup after a high-heat chicken cook
- Bear Mountain apple pellets: mild, sweet smoke for poultry
- Frank’s RedHot Original: the base for the Buffalo glaze
As an Amazon Associate, The Dialed In Home earns from qualifying purchases.
The Bottom Line
The 0-400 method isn’t a hack. It’s a logical use of how pellet grills actually behave. The startup smoke burst is usually treated as something to cook around. This method cooks into it. The result is chicken that tastes as if it took twice as long, from a grill you didn’t have to babysit.
Both recipes above are weeknight-viable. Chicken wings in 60 minutes, thighs in 75. The prep on either is under 10 minutes. If you’re already running a Traeger or another pellet grill, there’s no reason not to try the 0-400 method this weekend.
The Dialed In Home covers techniques, gear, and recipes for the home cook who wants results without overcomplication. All recipes tested on a Traeger Pro 575.
